Do you love photos and seeing them displayed in your home?
I do and my favorite way to display them is by creating a gallery wall.
I have teamed up with a great print house, Parabo Press to demonstrate a new way to display your favorite photos. First, let me give you a quick back-story about our previous gallery wall. Last year around this time we repainted our home and of course, in so doing this we had to remove everything on the walls. Our very first gallery wall consisted of different frames and cute signs and I really loved it. But it did not allow for an easy way to update photos.
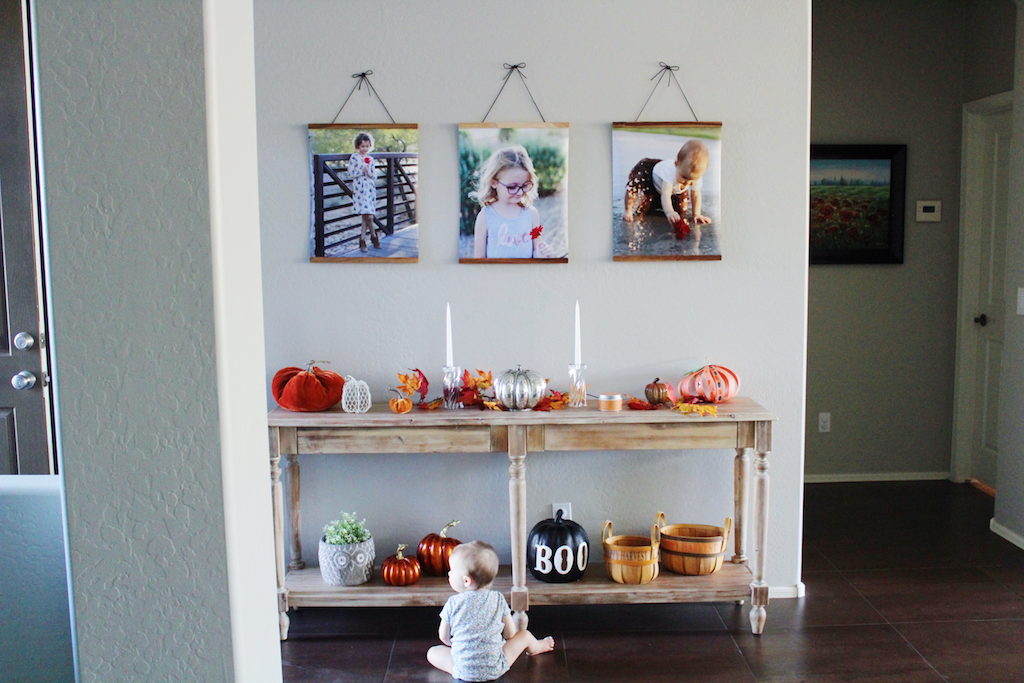
So, after months of a large blank wall and trying to decide on a new idea, I came up with a way to display beautiful photos and an easier way to change them out too. Parabo Press has many different options to choose from and I really love their oak poster rails because they are beautiful and much easier to swap out photos or artwork. You can choose from several different sizes ranging from 12” all the way up to 48” too.
Instead of a traditional family gallery wall, I decided to just display our three girls. Our front entry wall is about 84” wide so I chose three 16X20” poster rails and they fit very nice on our wall.
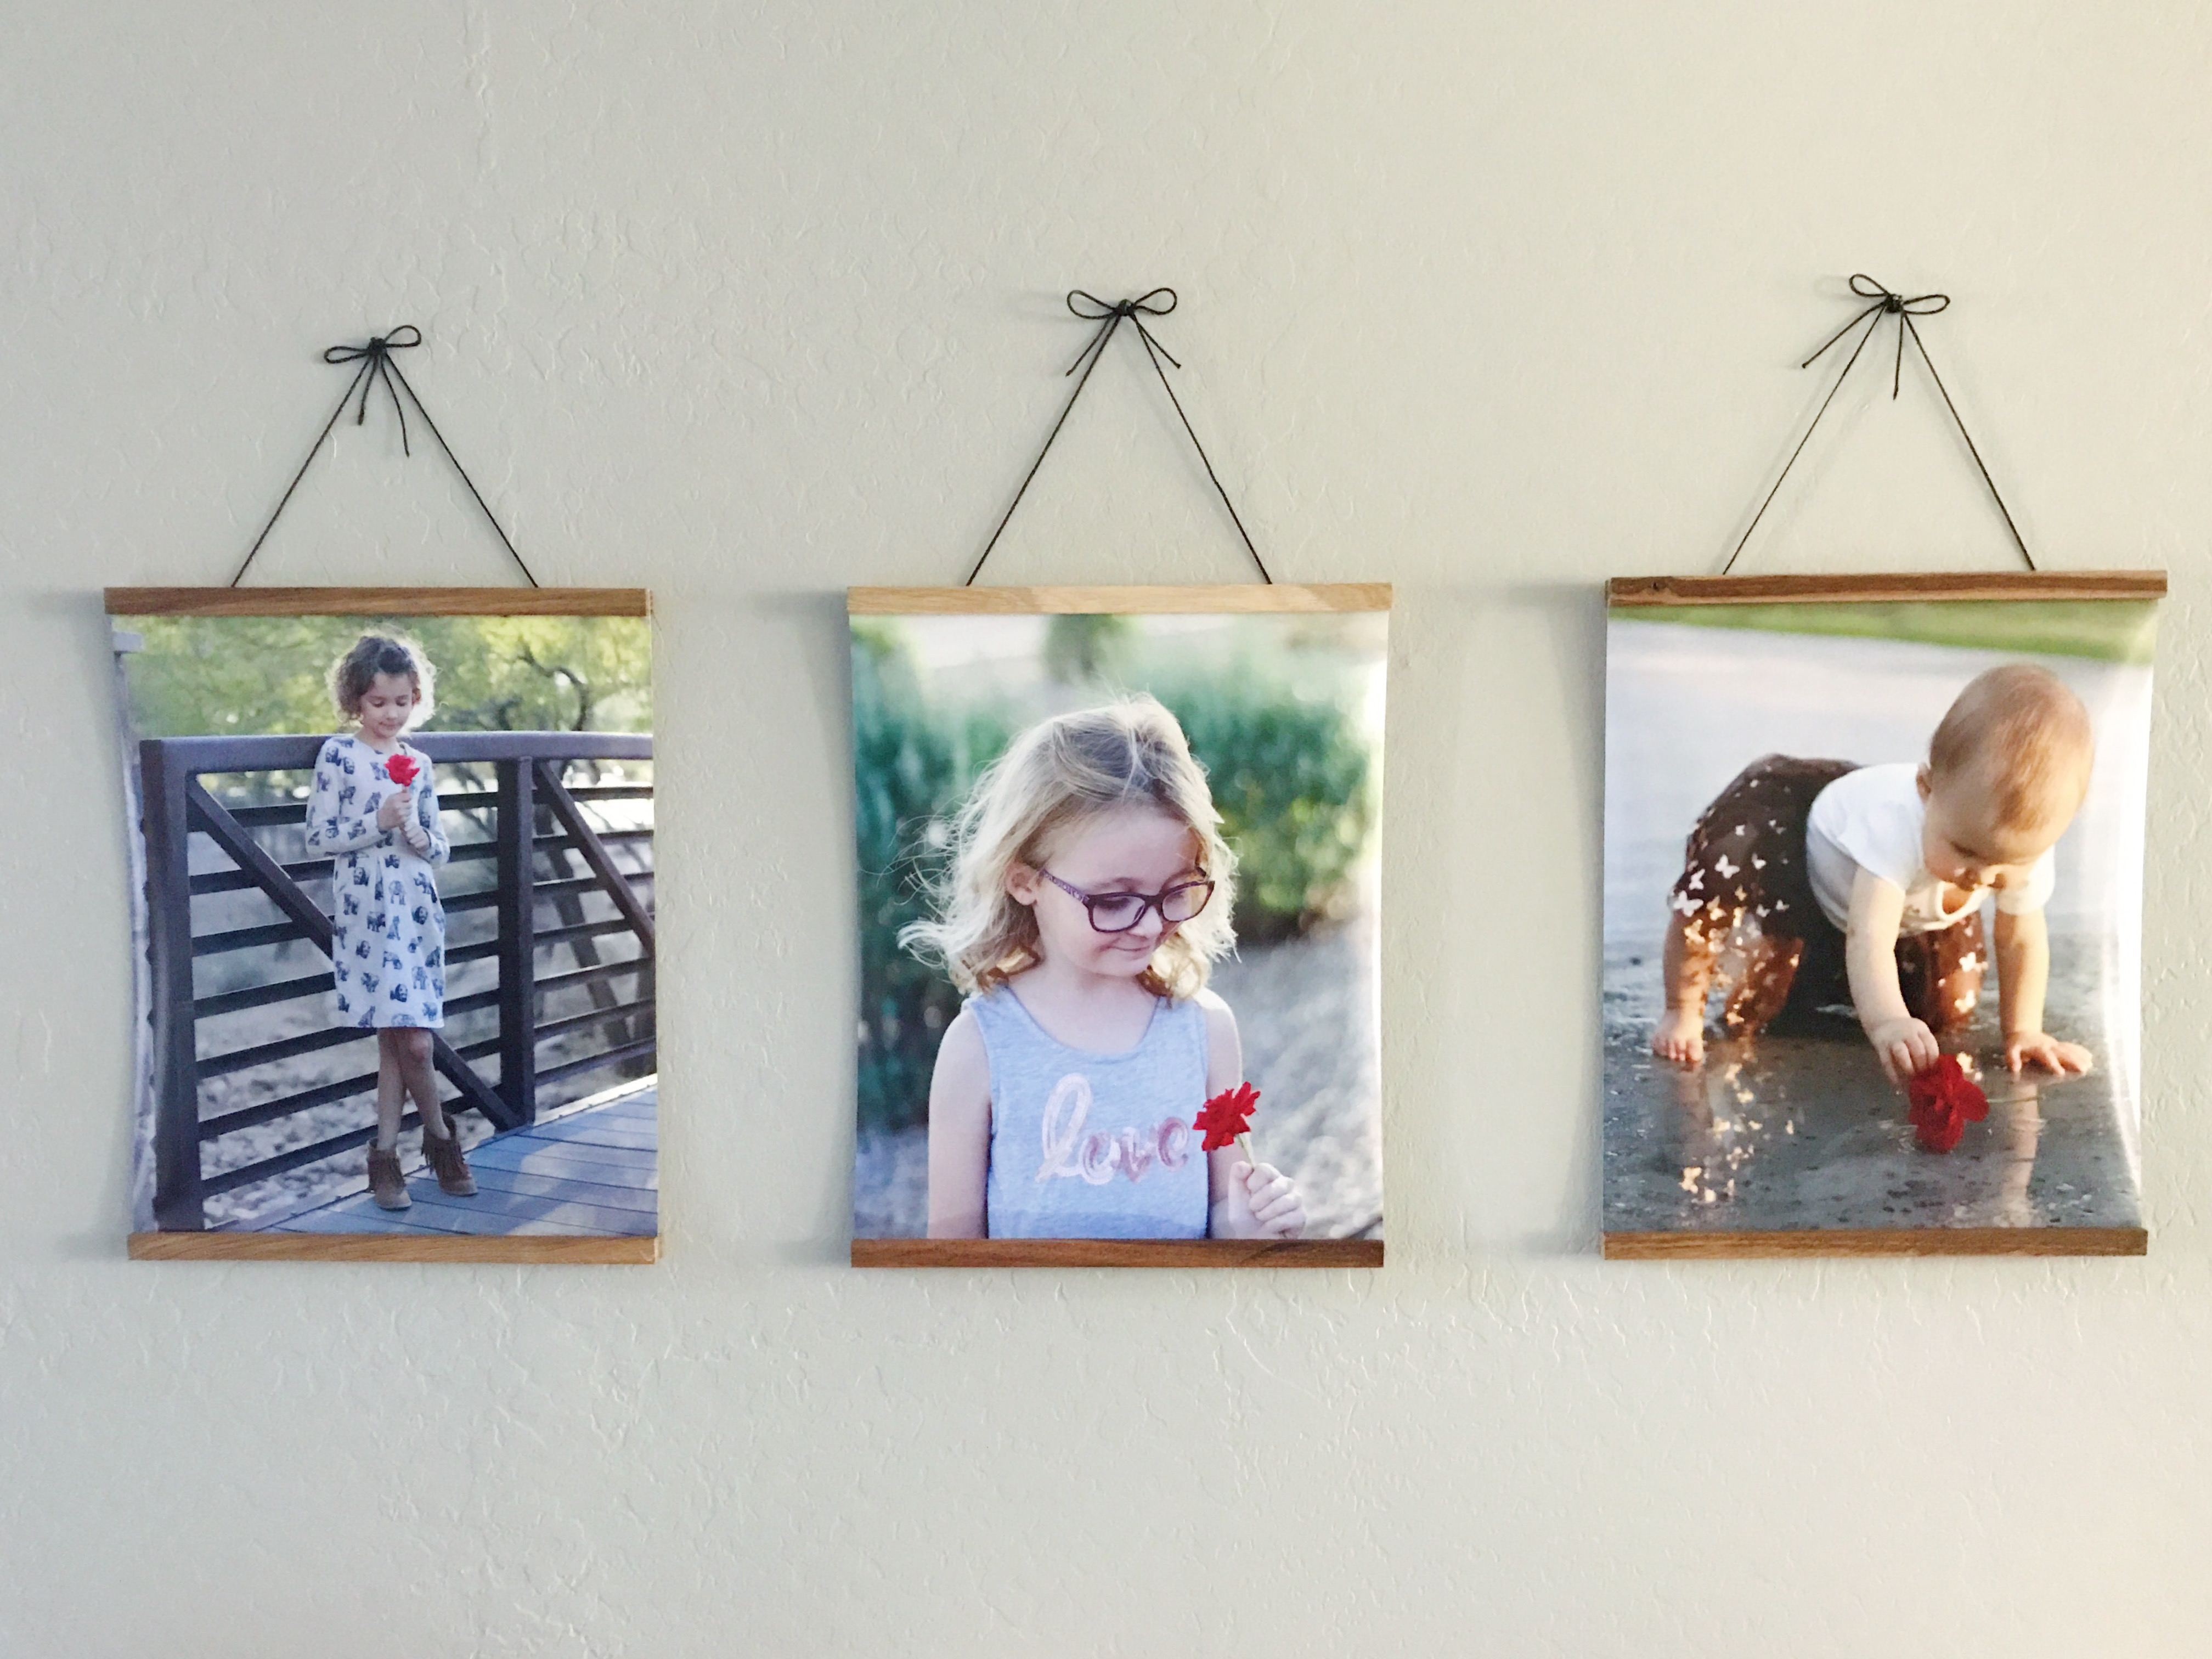
Poster rails C/O: Parabo Press
The poster rails are magnetic and this is what will hold your photo or poster straight and in place. I don’t know about you but I pride myself in trying to do projects like this alone (without bugging the hubs) and for the most part, I was able to. I’m going to walk you through how I measured and positioned these along with a couple simple tips too!
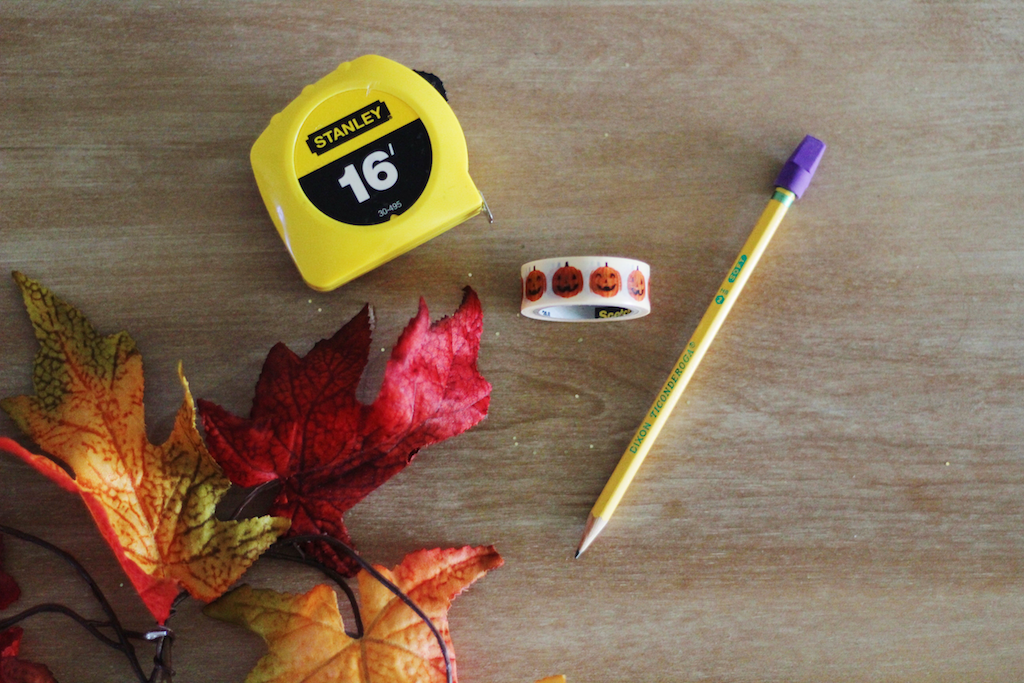
STEP 1. Measure the width of your wall. This will also help you decide on the size of your gallery too. Like, how many frames or rails and the size of them.
STEP 2. Once you know the width of your wall, divide and conquer. In our case, our wall is 84” wide. The height is up to you. 72” H from the floor is a pretty good place to start in my opinion.
84” W ÷ 2 = 42” (this marks your center point on the wall)
Each poster rail is 16” W and half of 16 is 8 so I placed the measuring tape at this midpoint on the 42” mark or center point on the wall.
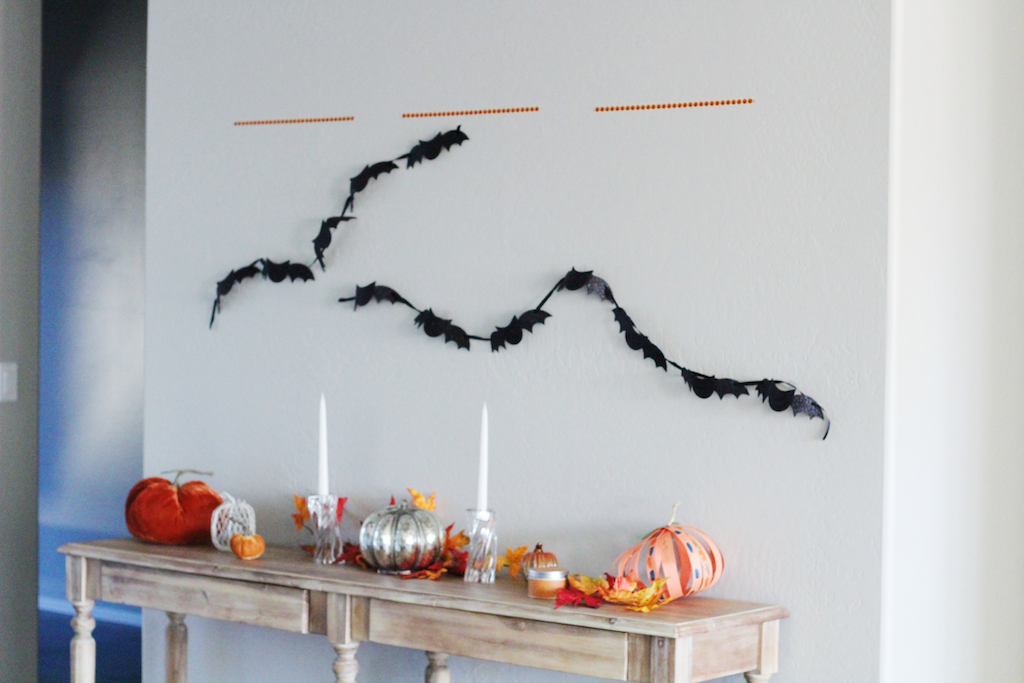
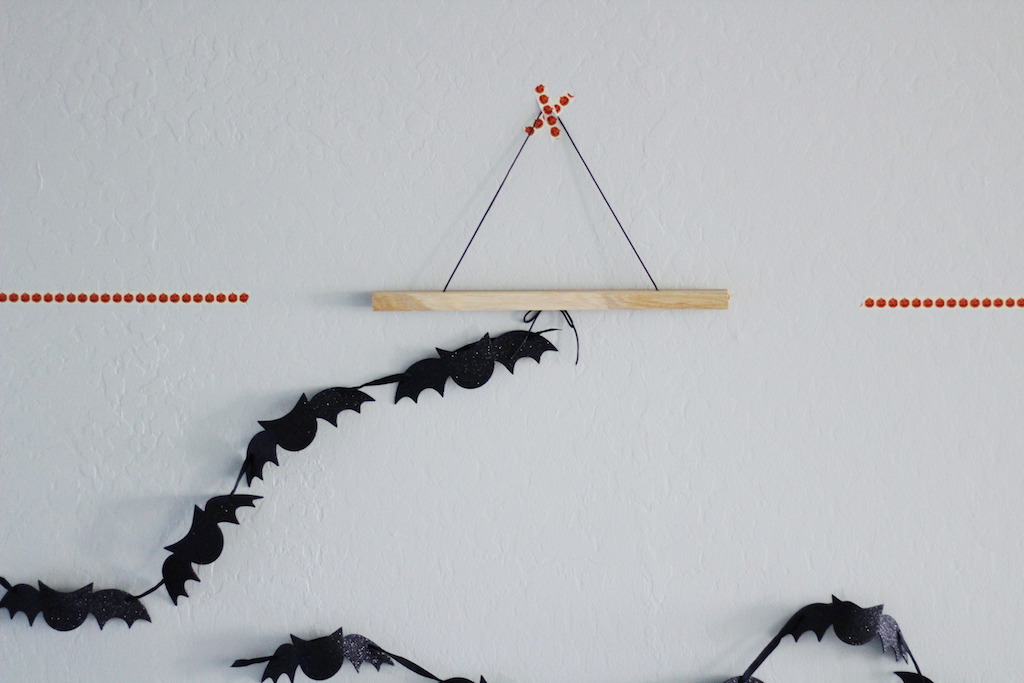
STEP 3. Using the measurements above make light dash marks with a pencil marking where the middle poster rail will go.
STEP 4. Grab painters tape or in my case, pumpkin washi tape and cut 16” and line up with your pencil marks. Using tape is magic because if you measure wrong you will see it and you can just try, try, again!
To find my other two measurements, I divided 42” by 2. Measuring from the outer edge of the wall to 21” on both sides will space them correctly. Repeat steps 3 through 4. Then, it is always nice to double check your math so I took out my measuring tape and measured each space in between to make sure my spacing was right. If you are satisfied with the ole eyeballing method, that works too! There is 12” on both sides and 6” between photos and they center nicely behind our entry table.
Now that your measurements are correct and your tape is up, you are ready to hang your work. So I did all the above myself but I did need the hubs help to hang. If you have drywall like we do, hanging pictures can be a real challenge. Because we have zero confidence in the strength of our drywall we almost always use 3m velcro command strips. We attached a strip to the center of each top rail for reinforcement. This also helps to keep your photos straight over time too. I’m really happy with the results, what do you think? If you love it, use code OCT25 at checkout for 25% off your order!
xx, Nicole